Video Podcast: What Is It & How to Create It
A guide on video podcasts, four ways to create them, how to distribute them and which equipment you need for video podcasts.

We've recently explained what a podcast is and briefly told you about video podcasts in that piece. This time, we're diving deeper into video podcasting and figuring out if a podcast can actually be a video, how to create such a podcast, and why you might want to make it to skyrocket your audio storytelling efforts.
What is a video podcast & can a podcast be a video?
A video podcast, which is sometimes referred to as vidcast, is a podcast with a video element in it, such as a static background image, boomerang, gif, or a video recording of the host and their guests.
Even though most podcasts are audio-only, the popularity of video podcasting is growing, since platforms like YouTube or Instagram allow creators to attract more listeners and monetise their shows. Besides, services like Spotify and Apple Podcasts now support video podcasts as well.
💸 To have a better idea of how to make money podcasting, check our detailed guide on the matter with 14 actionable ways of podcast monetisation.
Video podcast vs. audio podcast
Are you hosting an audio-only podcast or just starting a podcast and wondering if you should use videos? Well, video podcasting isn't always a thing every podcaster needs, especially right from the start. Videos surely have their advantages, but video production costs more than regular podcasting as it requires more pieces of podcasting equipment.
Besides, production and post-production of videos require lots of time. To turn your podcast into a video, you need to shell out on a camera, lighting, video editing software and have more time to distribute your content across video-focused platforms.
💡 If you're just starting, you're on a budget, or don't have enough time to invest in podcasting, the ideal solution for you might be audio-only podcasting.
However, you may choose a static image as a video element or simply record yourself when making a podcast with little to no post-production. In such cases, the difference between audio and video podcast creation is minimum.
On the other hand, if you distribute your podcasts as videos too, you might attract an audience who aren't active users of conventional podcast streaming services but who'd better open YouTube and find something there, even as background content.
So, in a nutshell:
🔴 Audio podcasts: Easier to produce and edit, cost less, and require less time.
🔴 Video podcasts: More expensive, more complex to produce and edit, may attract listeners who aren’t active on podcast streaming platforms, thus expanding your reach.
Another argument in favour of video podcasting is that vidcasts are primarily made for YouTube, and 43% of podcast listeners prefer to have their favourite podcast content on YouTube and actively watch podcasts with video elements in them, while 28% even actively watch while listening. What does this data mean for you as a podcast creator? That there’s definitely a demand for video podcasts among listeners. Besides, social media platforms, such as Instagram which used to be an image-sharing app, currently cater for video content too.
4 ways to record a video podcast
Strictly speaking, we can divide video podcasting into four formats depending on which video or image type you’re going to use. Your video podcasting equipment (which we'll talk about later) will depend on the format you want to choose.
1. Static image recording
Making video podcasts out of your current audio show with a static image is the easiest, least expensive, and less time-consuming way to srart video podcasting. All you need to do is to convert your podcast audio recording into a video file by adding a static background image and upload the vidcast to YouTube. However, such video podcasts are the least engaging.
2. In-studio recording
This format implies that you record yourself as well as your guests and co-hosts in a studio when making the podcast. This method is easy to implement: you just set up cameras in front of your guests and yourself and then merge audio and video tracks during post-production.
Note that if you follow this route, your video element will only be available on video streaming platforms (duh!), as well as Spotify and Apple Podcasts as they allow streaming video podcasts now. All other podcasting services, such as Google Podcasts will only play the audio.
3. Remote interview recording
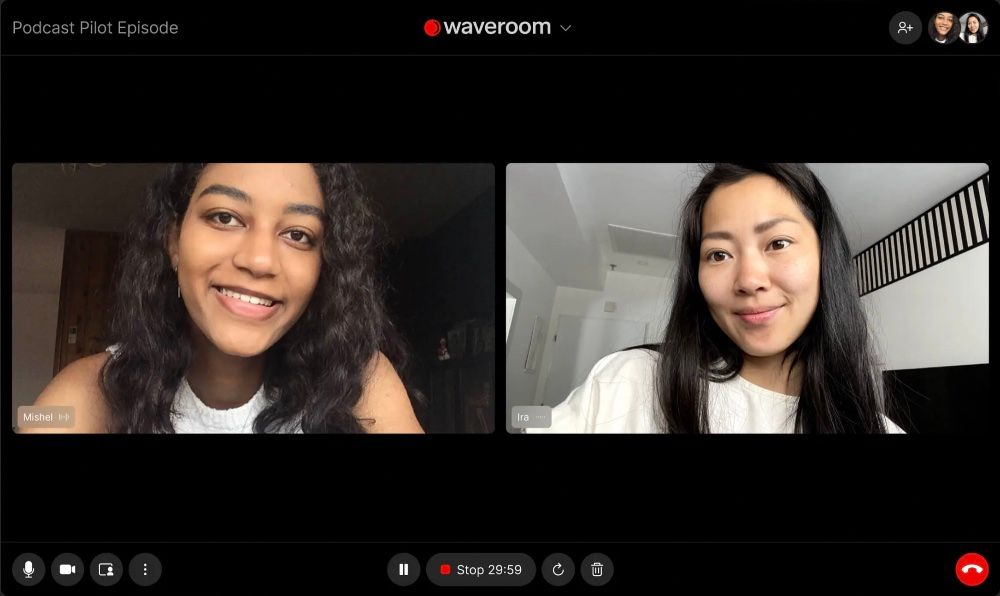
A remote interview means that you record yourself and your interviewee(s) when you aren’t in the same studio using video conferencing or recording software, such as Waveroom. A remote video interview implies that the video shows all speakers at the same time. Apart from video recording software, you won’t need anything different from your audio-only podcasting equipment.
The drawback of this format is that the quality of the interview might be poor because of a bad Internet connection or insatiable bandwidth. However, you can eliminate this drawback by choosing the right software that makes recordings without depending on the Internet connections but recording locally instead.
Local recording means that the session recording takes place on your computer instead of over the Internet. So, even if the connection is poor or unstable, it doesn’t affect the quality of the recording. You get separate video and audio tracks of each guest after the session; all of them are recorded locally.
💡 Waveroom is such software that records audio and video tracks locally, so you can be sure your quality isn’t lost even if the Internet connection is poor.

Here's how it works:
- Log in to your Waveroom account or create a new one.
- Click the Create a Room button.
- Enter the name of your room at the top of the page.
- Set your Video, Audio and Record preferences under the video preview.
- Copy the invite link. Send it to people you want to join your video meeting.
- Click the Start Now button to open your room.
- Click the Start Recording button when you’re ready to begin the session.
- Click the hang-up phone button to end the meeting.
- Wait a few seconds while the meeting recording is saved.
- Click the All Rooms button at the upper left corner of the page.
- Click the room that you’ve been in. Here you can play and download the locally recorded video and audio files of each person who participated in the meeting.
That’s it!
4. B-roll recording
A blending of a b-roll footage and conventional podcasting, interview plus b-roll footage is another way to make a video out of the audio recording. How does it work? Just start making a podcast episode as you normally would and add elements you’re referencing to in your video. For instance, if you mention a data chart, add an image of the chart into your video during editing so that your audience can perceive some information visually.
Such video podcasts are very engaging; however, they can hardly be consumed as background content since the information you share in the video typically requires viewers’ attention. The production of such episodes is also rather time-consuming and complex, for you need to be an avid video editing software user.
Video podcast equipment
To produce video podcasting, you'll need a bit more podcast setup pieces; however, that depends on which video podcast type you’re into.
💡 Just FIY: We’ve already covered the best basic podcast equipment, so we won’t mention mics, headphones, and audio interfaces in this piece. Rather, we’ll cover the gear made for video creation and editing.
🔴 Equipment needed for static image recording: All you need is video editing software to merge the static image and audio file together. Solutions like Movavi, Final Cut Pro, iMovie, or Adobe Premiere Pro will do the job just fine.
🔴 Equipment needed for in-studio recording: At least one camera to record the conversation is sufficient, but multiple cameras will do a better job of capturing you and your guests from different angles. Then you just need to choose the angles during editing. To sum it up, you’ll need several cameras and video editing software.
🔴 Equipment needed for remote interview recording: You’ll need software that captures multiple webcams at the same time, like Waveroom.
🔴 Equipment needed for b-roll shooting: Video editing software would be a sufficient add-on to your current podcast equipment.
Camera
You may consider options like Logitech C920x HD Pro Webcam. It’ll give you HD 1080p recording, has built-in lighting adjustment, and costs around $60. Another option to pay attention to is Sony HDR-CX405/B.
Tripod
If you’re going to use multiple cameras for different angles of capture, consider purchasing a few tripods for your convenience. For instance, this portable 40″ alloy phone tripod is a nice and affordable option.
Lighting
The process of video capturing is nearly pointless without good lighting. Besides, if you have proper lighting, it’ll spare you hours of post-production and editing with no need to fix a poor image.
Check 10″ LED ring light that provides the dramatic eyelight as well as three light temperature settings to align with other lights in the room. Some other options to look at are the affordable Fancierstudio lighting kit and the Neewer lighting kit.
Video podcast hosting providers: How to distribute video podcasts
When you think of distributing video podcasting, YouTube is the first place that comes to mind. However, YouTube is not an RSS feed or a podcast host, so when you upload a video podcast to the platform, it remains there and isn’t distributed to podcast streaming services. If you want to attain more reach, listenership, and discoverability, you should keep proper podcast hosts in mind.
If you want your video podcast to be distributed in Apple Podcasts, you can use the Podbean or Castos podcast hosts to achieve this. If your primary target is Spotify, opt for Anchor.
Do you have any other questions about video podcasting? Follow Waveroom on Twitter, Instagram, Facebook and Reddit to always be in the loop with all our updates and connect with us!