Latest Waveroom Features You Might’ve Missed
A few tools to make podcasting and content creation with Waveroom easier and more efficient.

We've rolled quite a few features recently, and to make sure you didn't miss them (or to remind you of them if you did), we're writing them up in this piece. In response to your feedback, we've released tools designed to make podcasting and content creation with Waveroom easier and more efficient. Here are the tools in question.
AI-Powered Speech-to-Text Transcription
Manual transcription is a time-consuming task that many podcasters dread. With Waveroom's new AI-powered speech-to-text transcription feature, you can say goodbye to third-party software and manual labor. Here's how it works:
- Log in to Waveroom.
- Select your microphone and headphones in the Devices tab under the video preview. For the best results, use high-quality equipment.
- Click the Start Meeting button to begin your recording. To test it first, use Start Test Record.
- Press Record when you're ready to start.
- Click Stop to end the recording when finished.
- Wait a few seconds while the recording saves.
- Click X to leave the meeting once you see the Upload Completed notification.
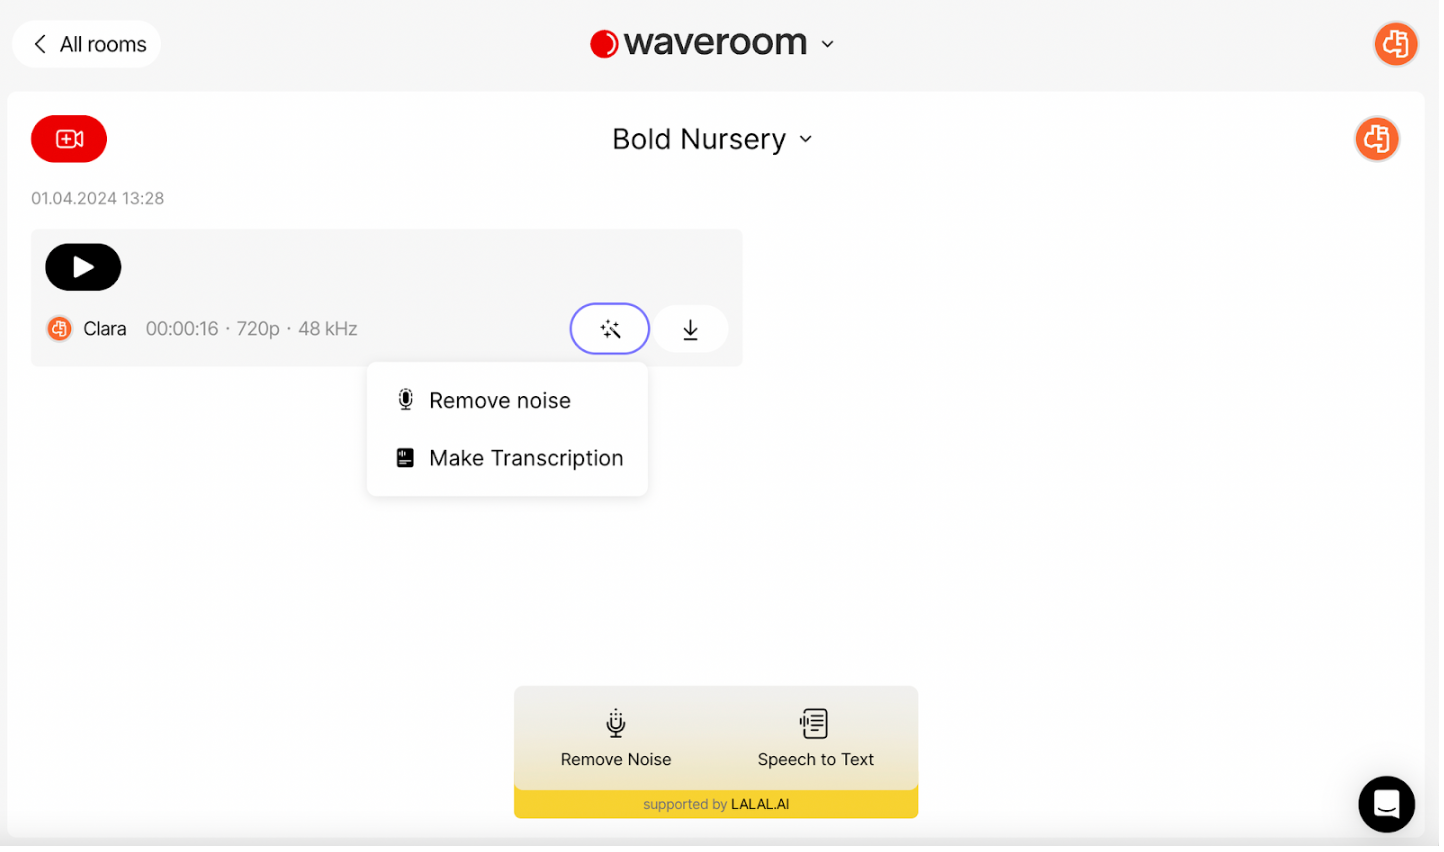
- Denoise the recording by pressing the Remove Noise icon. This step is crucial for the transcription feature to work.
- Press Make Transcription to convert your recording into written words.
The transcription will be marked with a book icon labeled "transcription applied." Download the transcription by pressing the downward arrow icon. The file will be saved in .srt format, complete with timestamps.
AI-Fueled Summary of Recordings
Waveroom now also offers an AI-fueled summary feature to help you condense hours of dialogue into concise summaries. This tool is perfect for creating quick overviews of your content. Here's how to use it:
- Log in to Waveroom or create an account.
- Select your microphone and headphones in the Devices tab under the video preview.
- In the AI tab, toggle on all three options: Remove Noise, Transcribe Speech, and Create Summary.
- Click Start Meeting to begin your recording. For testing, use Start Test Record.
- Press Record when you're ready.
- Click Stop to end the recording.
- Wait a few seconds for the recording to save.
- Click X to leave the meeting after seeing the Upload Completed notification.
- Download the summary by pressing the downward arrow icon → Summary.
The summary will also be saved in .srt format and can be viewed in any text editor.
AI-Powered Noise Removal
We understand the challenges of recording in less-than-ideal environments. To address this, we've partnered with LALAL.AI to bring you an AI-powered noise removal feature.
Here's how to use it:
- Log in to your Waveroom account or create one.
- Click Create Room.
- Set your Video, Audio, and Record preferences under the video preview in the Devices tab.
- Click Go to Test Record or Start Meeting to begin recording.
- Click Stop Recording when finished.
- Wait a few seconds for the recording to save and click the cross button to leave the room.
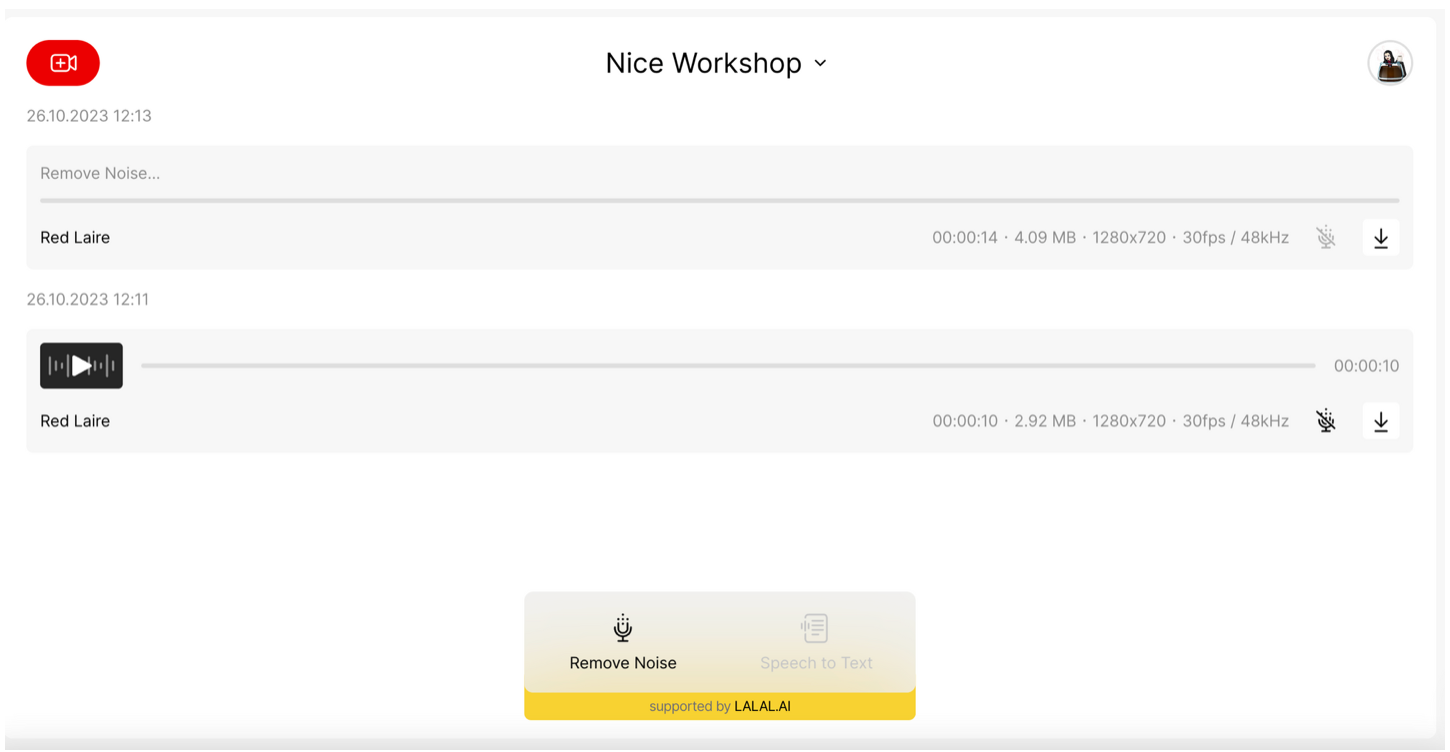
- Press the Remove Noise button to eliminate background noise from your recordings.
The noise removal feature works for both audio and video tracks, ensuring your content sounds crisp and professional. Post-processed tracks will be labeled with a noise removal icon.